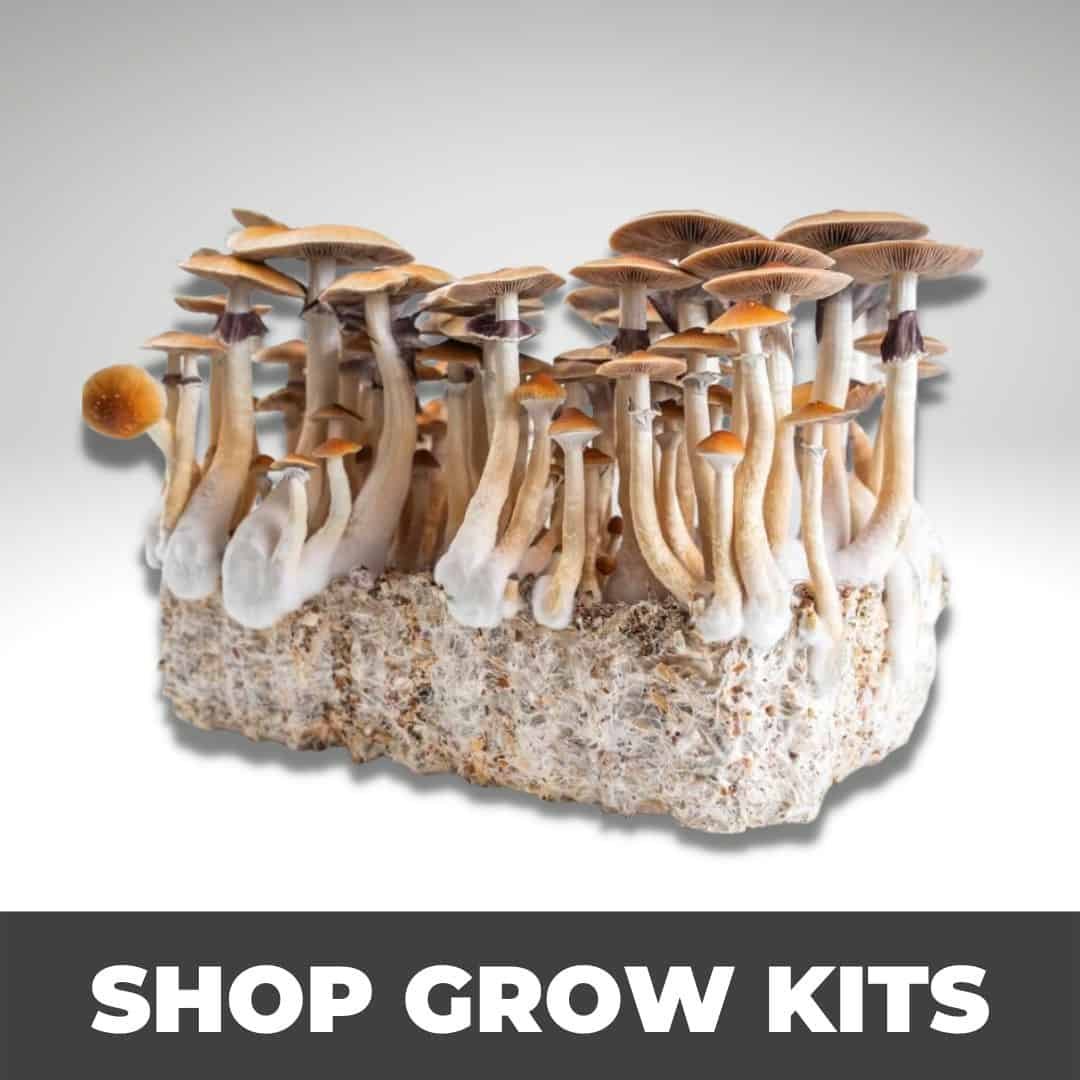
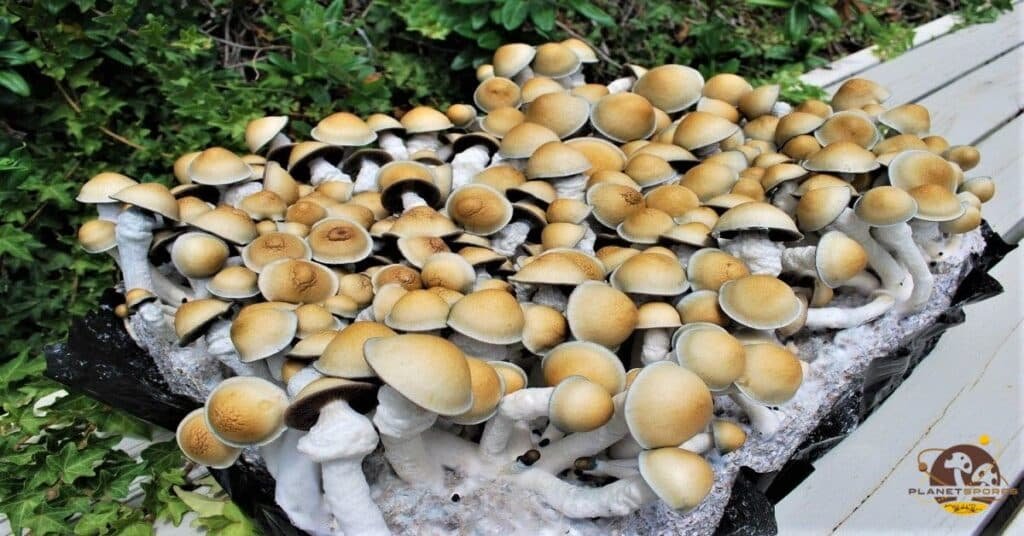
Monotubs are an all-in-one fruiting chamber that is not only used for fruiting mushrooms but is also used to mix mushroom spawn and bulk substrate. Monotubs are commonly made from a large clear plastic tub that has been modified with air holes. They are primarily used to cultivate or fruit psilocybin mushrooms, but can also be used to grow other varieties of mushrooms.

Monotubs make for an excellent option for growers ranging from novice to expert, who are looking for a straightforward, cost-effective growing method. The simplicity of monotubs has made them a very popular option for all growers. Minimal space is needed and equipment requirements are accessible to the masses. This allows anyone to be able to cultivate fruit mushrooms in the comfort of their own home.
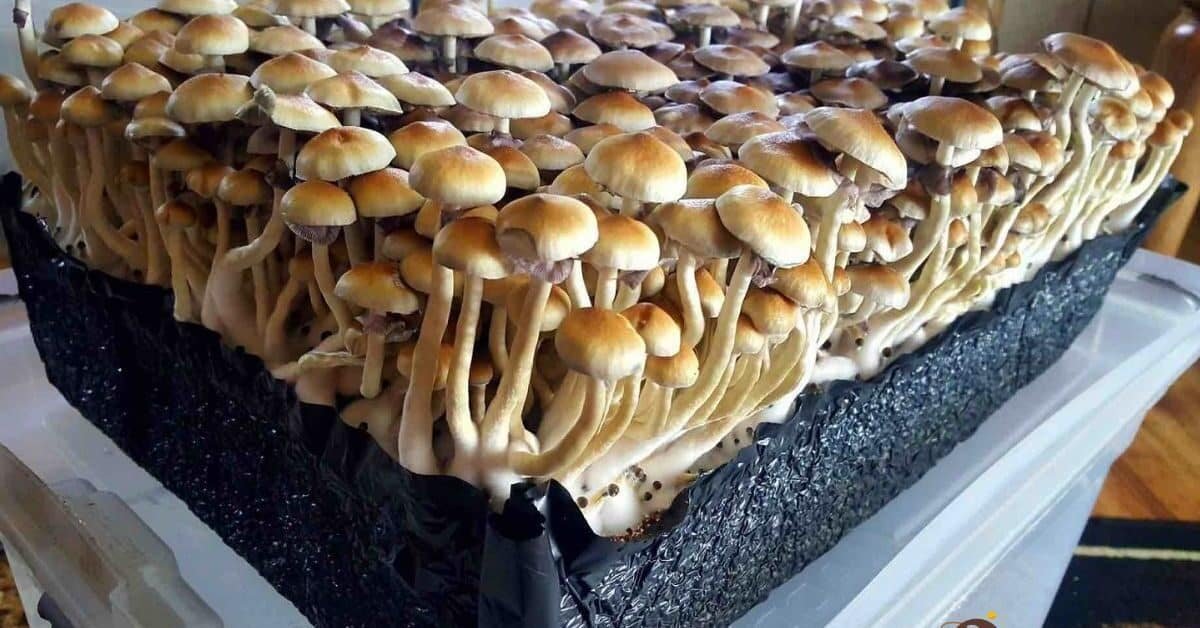
Monotubs also have the capability of producing much larger yields than mushroom grow kits or mushroom grow bags. Unlike the use of mushroom grow bags, monotubs can be cleaned and reused, making them a cost-effective option with minimal waste.
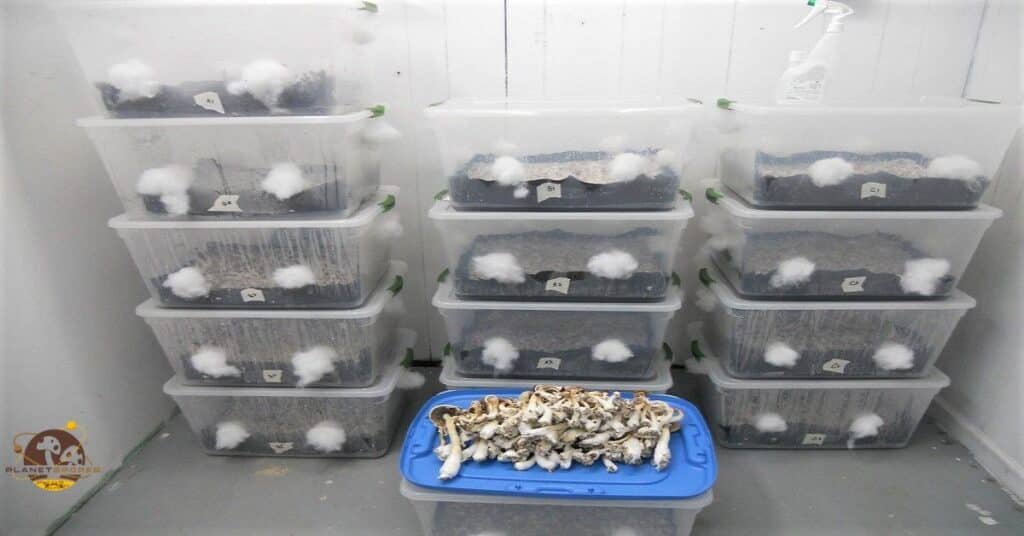
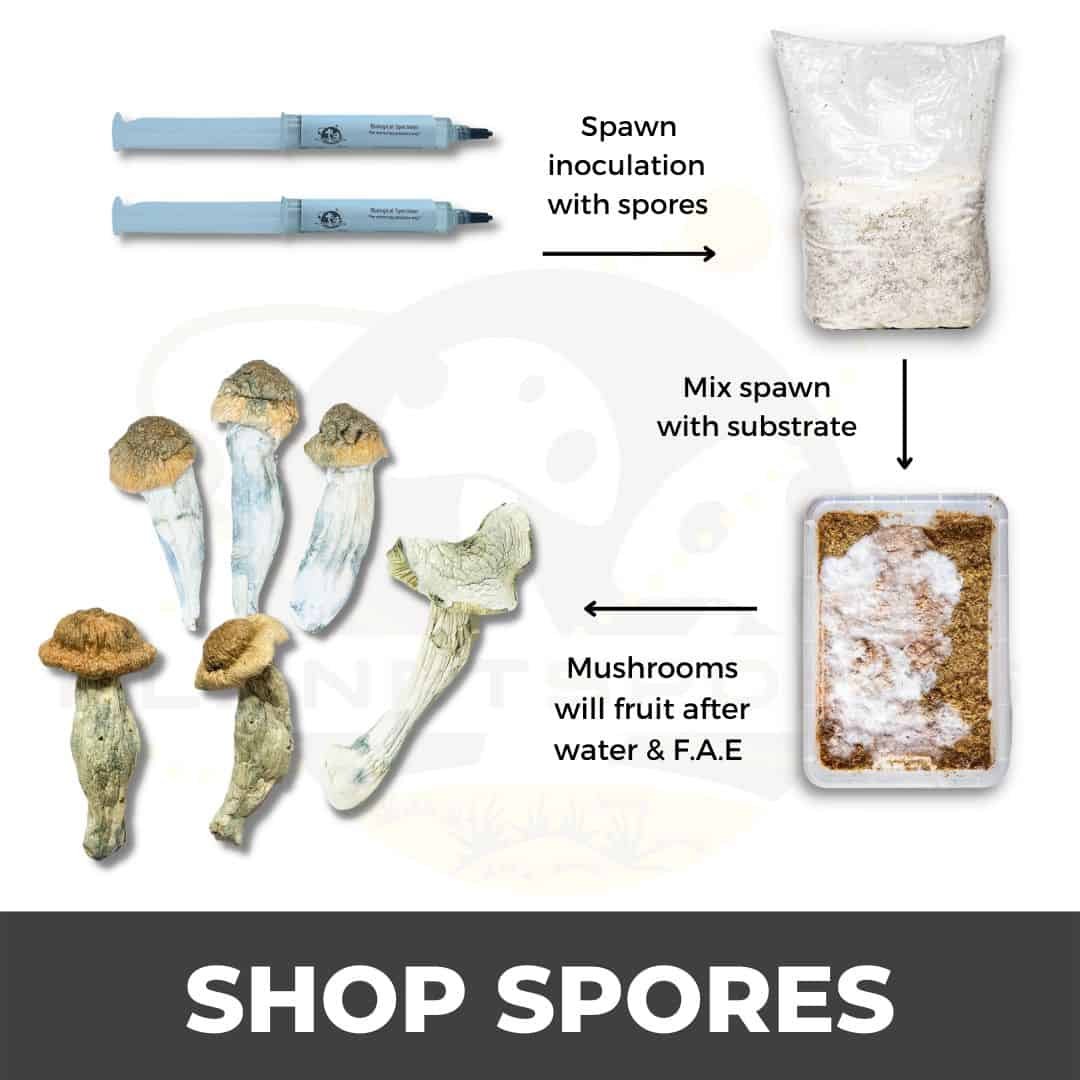
Typically a monotub is made with six holes. Four holes will be closer to the substrate, whereas the other two holes will be higher, preferably near the top of the tub. These holes will be stuffed very tightly to restrict airflow during the inoculation process. While mycelium from mushroom grain spawn is spreading throughout the bulk substrate, heat and CO2 is generated. This makes for an optimal environment for mycelium growth.
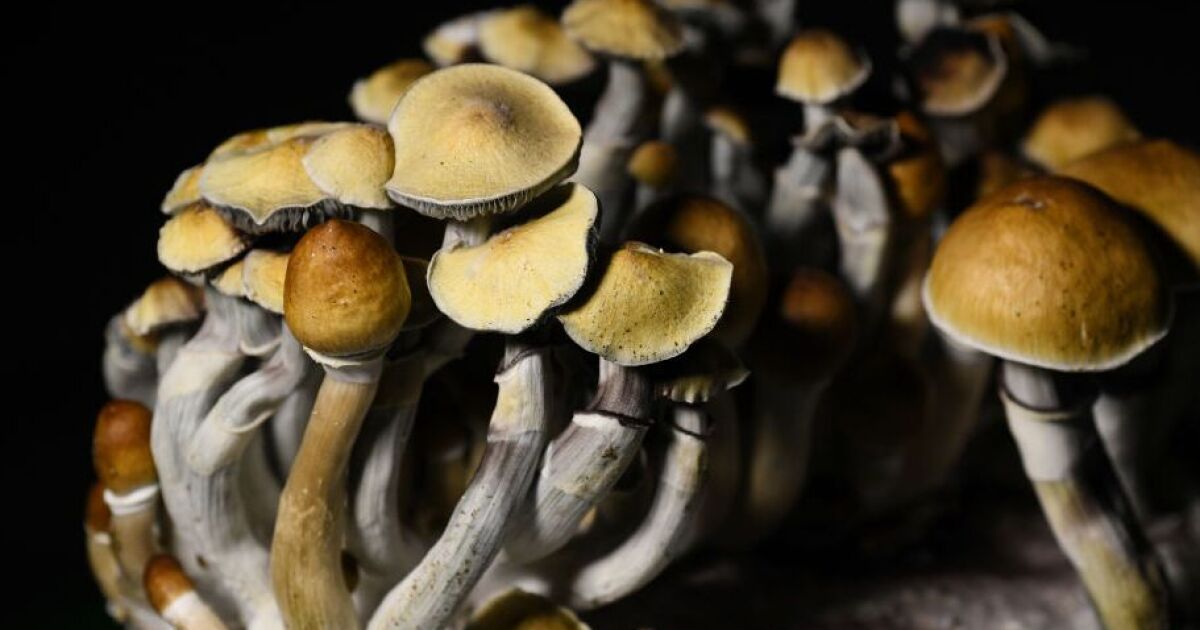
Once the bulk substrate has fully colonized, hyphal knots will begin to appear. Hyphal knots are the first stage of a mushroom fruit body. What comes after hyphal knots is primordial formation, also known as pins or pinset. At this stage, fresh air exchange is needed for optimal growth of the fruiting bodies. This is where the simplicity and advantages of a monotubs shine. The monotub will now require more airflow. This can simply be done by removing a small amount of the poly-fil so that it is no longer extremely tightly packed to allow for more airflow. Be sure to remove small amounts at a time to limit the chances of contaminants entering the monotub.

Since hot air rises because it is lighter than cool air, the hot air inside of the monotub will rise and escape through the top two holes. As the hot air escapes through the top two holes, cool air is being drawn in through the lower four holes that are closer to the substrate. The poly-fil maintains humidity while still allowing for fresh air exchange. As cool air is being drawn in, it will heat up and combine with CO2 and escape through the top. This air circulation will induce prime conditions within the monotub to establish fruiting.
The ease of crafting your own monotub at home is one of the factors that makes them so popular.
Gather your materials and follow this simple guide to craft your own monotub!
To begin, measure out and mark where the holes will be cut out. The longer sides of the tub will need two holes each. These holes should be roughly eight inches apart or more if possible, depending on the tub size. The holes should be at least three inches from the bottom of the tub as well. Ensure the holes are high enough so they will be above the bulk substrate.
Now the other two shorter sides of the tubs will most likely be where the handles of the tub are. If the tub has handles, simply mark slightly under the handle and that’s where two holes can go. With the two holes on the short sides of the tub, it is crucial that they are up higher than the rest of the holes.

Using a hand drill with a 2 inch hole saw attachment, apply gentle pressure to the hole markings that you have previously marked out. Continue to apply gentle inward pressure until the teeth of the hole saw catch into the plastic, then switch the drill to reverse (while the teeth of the hole saw are still caught in the plastic) and begin to run the drill in reverse.
Attempting to drill the hole while the drill is in the forward position will put too much stress on the plastic tub, which in turn will increase the chances of the plastic cracking greatly. Initially using the drill in a forward position and gently applying forward pressure will give the hole saw a solid and steady position. Then running the drill with the hole saw attachment in reverse will cause the hole saw to slowly melt the plastic away without cracking it.
Repeat until all holes are cut out.

If using a hand drill with a 2-inch hole saw attachment is not plausible, using an exacto knife or shears can produce similar results. It is very important if you are using this method to take your time cutting the holes out. Being too rough and trying to cut too forcefully can crack the plastic tub, resulting in starting all over.
Blocking light from reaching the bottom and sides of the bulk substrate is an important step. It will encourage pinning from the top of the substrate rather than the edge or bottom. Fruiting bodies from the edge and bottom of a substrate are very difficult to harvest. It also takes the energy away from what could be grown on top, where it is easier to harvest. To combat this there are a couple of options.
Simply spray paint the bottom of the tub. Paint up to the bottom of the holes on the sides of the monotub.
Another option is to line the bottom of the inside of the tub with a garbage bag that has been sanitized (avoid taping the garbage bag to the side of the tub, this can cause side pins, and you want the bag to mold and stick to your substrate).
It is beneficial to block light from coming through the bottom of your tub to prevent the mushrooms from growing from the sides or bottom of the cake.

With the holes cut out and light blocked at the bottom of the tub, your monotub is essentially ready to be a vessel for mushroom spawn grain to inoculate bulk substrate. Before mixing mushroom grain spawn with bulk substrate, the holes must first be tightly stuffed with polyfil to restrict airflow. After filling the holes it is necessary to wipe down the inside of the tub with 70% isopropyl alcohol.
Do not forget to wipe the inside of the lid as well.
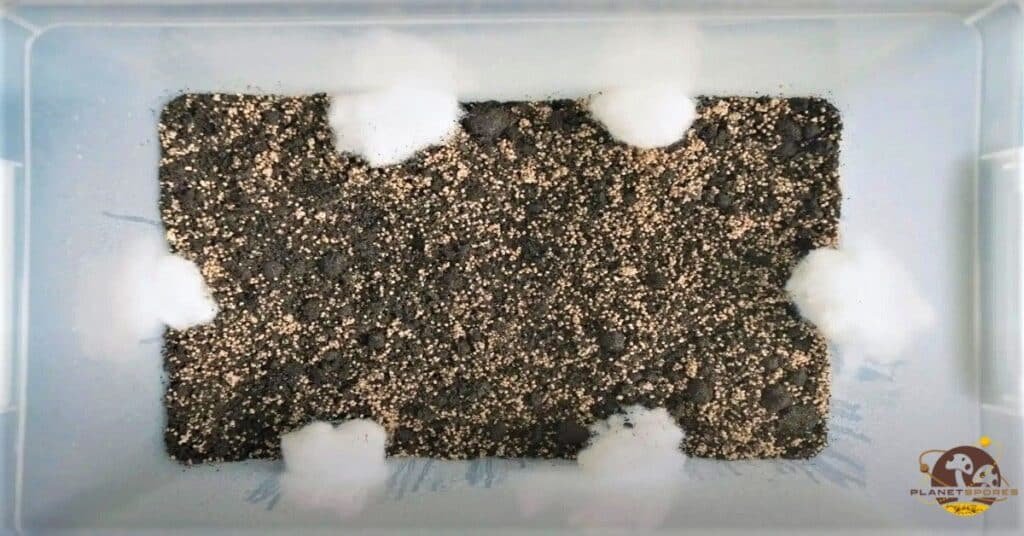
Once the bulk substrate has fully colonized and hyphal knots have started to show, remove small amounts of the poly-fil stuffing and increase humidity inside the tub. This will allow for fresh air exchange, creating an optimal microenvironment for the fruiting bodies to flourish.


Growing mushrooms can be incredibly rewarding until your mycelium stalls. You’ve inoculated your jars or substrate, and now you’re staring at the same patch of
In today’s age of wellness, where food and medicine intertwine more than ever, mushrooms have carved out a niche in the conversation about superfoods. These

Summary: Pet owners’ awareness of quality care keeps rising as they explore holistic methods that focus on preventive care, natural healing practices, and pet well-being.
In today’s fast-paced world, mental well-being has become a top priority for individuals striving to find balance amidst the pressures of daily life. Engaging in